Protocol
Flushing the oviduct and uterus is commonly used to collect 8-cell embryos from mice. But it takes lots of practice and is time-consuming. After ovulation, the early embryos travel down from the oviduct to uterus. At e0.5, they are in oviduct and travel down gradually and at e2.5, they reach to the junction of the oviduct and uterus. At e3.5, they reach to the uterus. Based on that, we find another way to collect 8-cell stage embryos. It is easier to learn and time-efficient. Collected morulaes can be used for ESc microinjection and other applications, e.g. embryo cryopreservation. We use this protocol successfully to get large number of embryos for ES microinjection.
Fig A: Reproductive Tract
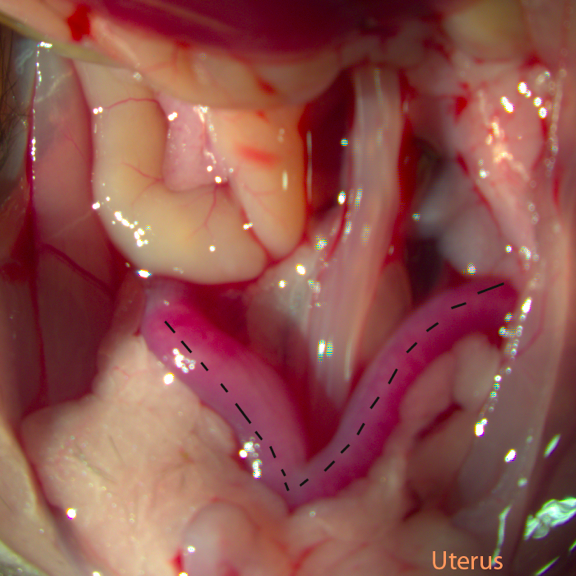
Fig B: Grab one uterus horn
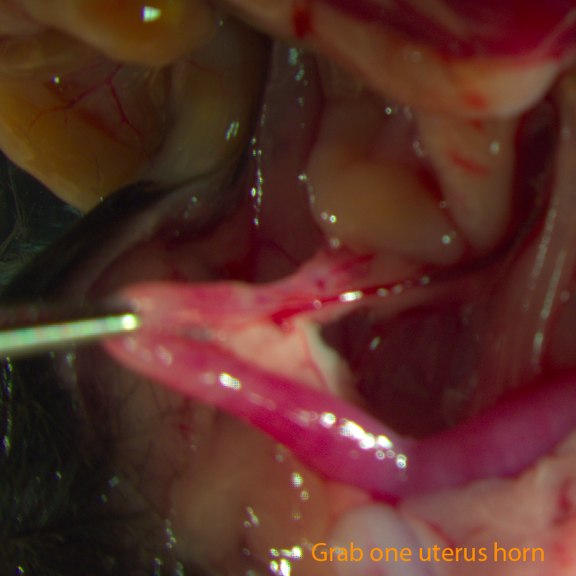
Fig C: Separate Mesometrium
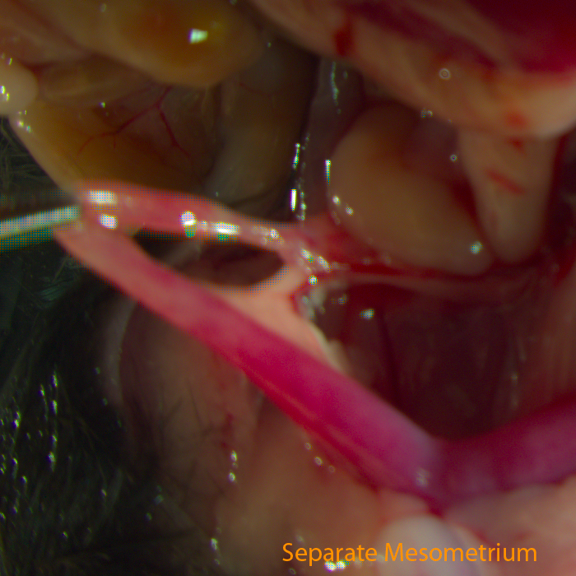
Fig D: Cut Uteral End
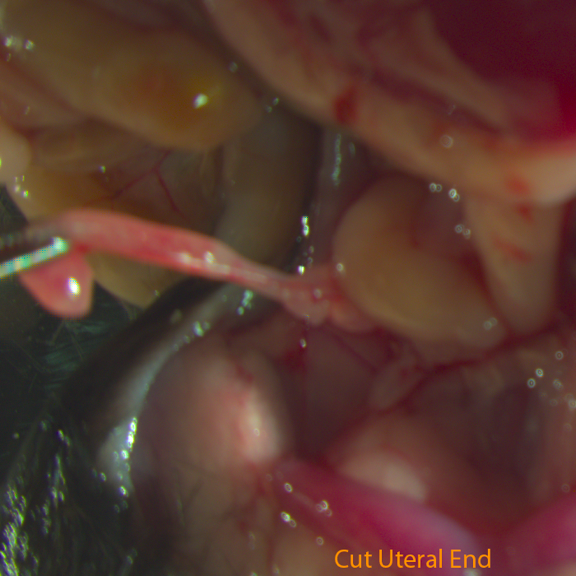
Fig E: Cut Tubal End (Two coils were marked)
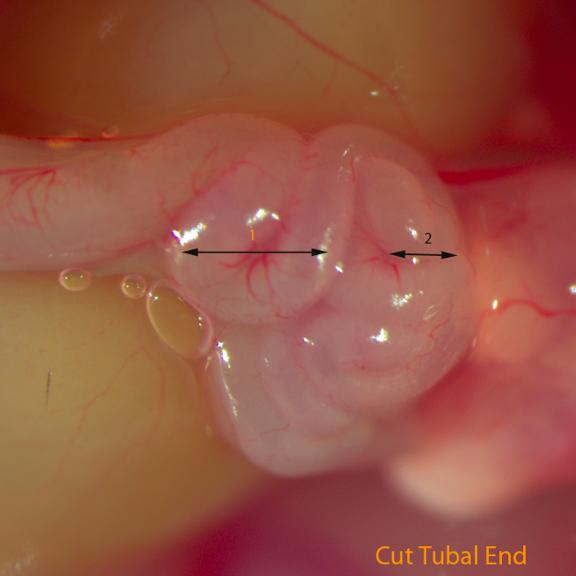
Fig F: Uteral-tubal segment

Materials
Pregnant female mice (dpc2.5): C57B6J, age 3 to 5 weeks old, superovulated, housed at barrier facility
Equipment
- Embryo-handling pipette consisting of mouth pipette assembly and pulled capillary
- Scissors, fine dissection
- Forceps, fine dissection
- 4-well plate
- Petri dishes, 35-mm
- Stereomicroscope
- Incubator
Reagents
- M2 medium at room temperature
- KSOM+AA at 37C, 5% CO2
- 70% EtOH
- CO2 supply
Methods
- Euthanize mouse by CO2 and cervical dislocation
- Place mice on its back on a gauze pad, wiping abdomen with 70% EtOH; Open the abdominal cavity
- Expose the reproductive tract using a pair of forceps
- Use one pair of forceps to grab the uterus 1cm away from the uteral-tubal junction, keep the uterus taut.
- Poke a hole in the membrane (mesometrium) close to the oviduct with the closed tips of a pair of fine forceps. Slide the tips to separate the mesometrium from the oviduct and distal end of the uterine horn, about 1cm long
- Cut the uterine horn 1cm below the uteral-tubal junction and cut part of the oviduct which contains one to two coils of oviduct to the uteral-tubal junction. Put this segment into M2 medium
- Repeat until all the uteral-tubal junctions were collected
- Move 5~8 uteral-tubal junctions into a 35mm petri-dish with M2 under a stereomicroscope
- Position the uteral-tubal junctions from uteral side to tubal side, from left to the right. Also, the part with mesometrium is away from you.
- Hold the uteral side with one pair of fine dissection forceps on your left hand while a pair of 55 forceps is held close next to the other pair. Press forceps on your right firmly and steadily walk the right forceps to the tubal side. Embryos can be seen to come out from the tubal end
- Repeat step 10 to finish all the uteral-tubal junctions
- Swirl the petri-dish gently to gather embryo in the center
- Use a mouth pipette to pick 8-cell embryos with good morphology. Wash them through 3 drops of M2 and finally transfer them into KSOM+AA for later use.